
SHOWERMI$ER is a product that can help RVer’s save freshwater and save gray tank capacity. When used, it bypasses the showerhead and sends water back to the freshwater tank while the water is warming up. This can save you a half to full gallon of water every time you shower. It also displays when the water is warm. It is made by Aqua View, Inc. and they have many models for different shower and sink setups. We have no relationship with nor did we receive any consideration from Aqua View in connection with this project.

Our coach is a 2019 Tiffin Phaeton 40IH. The shower came from the factory with the usual wall mounted/handheld spray head. It also came with a rain head that we don’t like and never use. Since we frequently boondock, we want to save every gallon of freshwater we can.
I believe that in 2020, Tiffin stopped installing rain heads and started installing SHOWERMI$ER systems. We had noticed that in one of their online brochures and started looking into the SHOWERMI$ER.
Water Flow
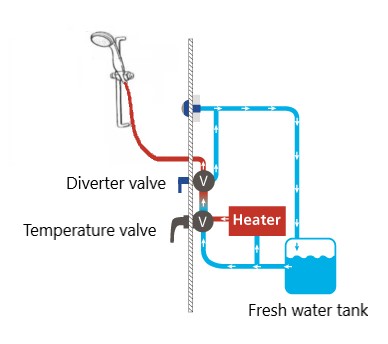
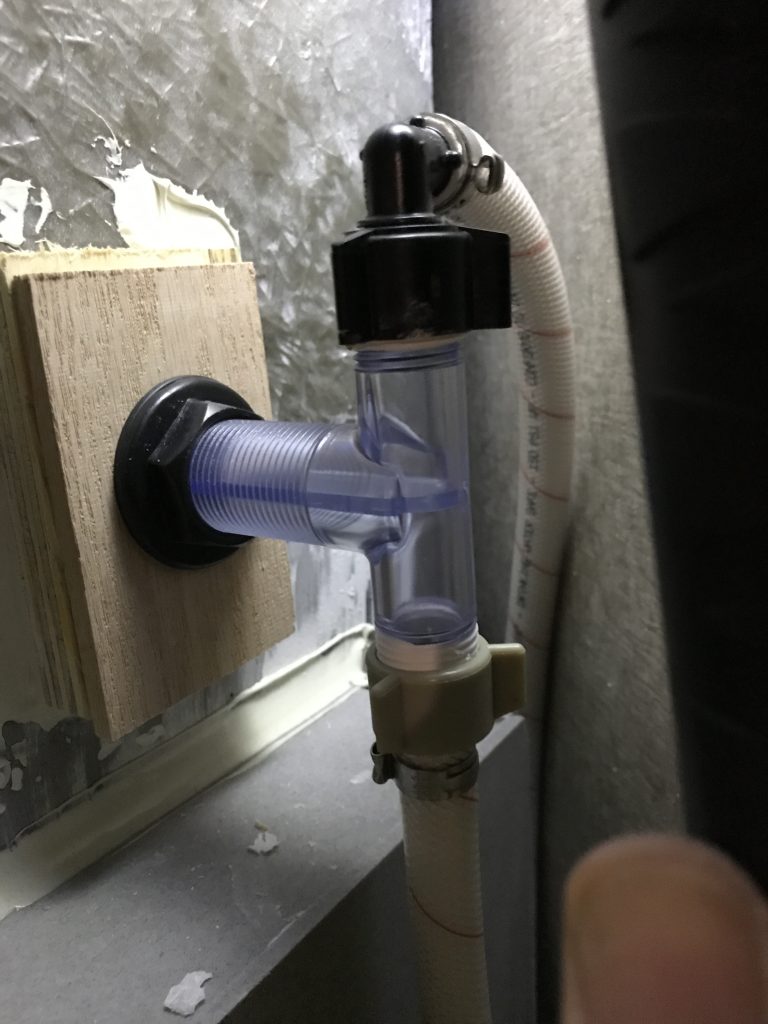
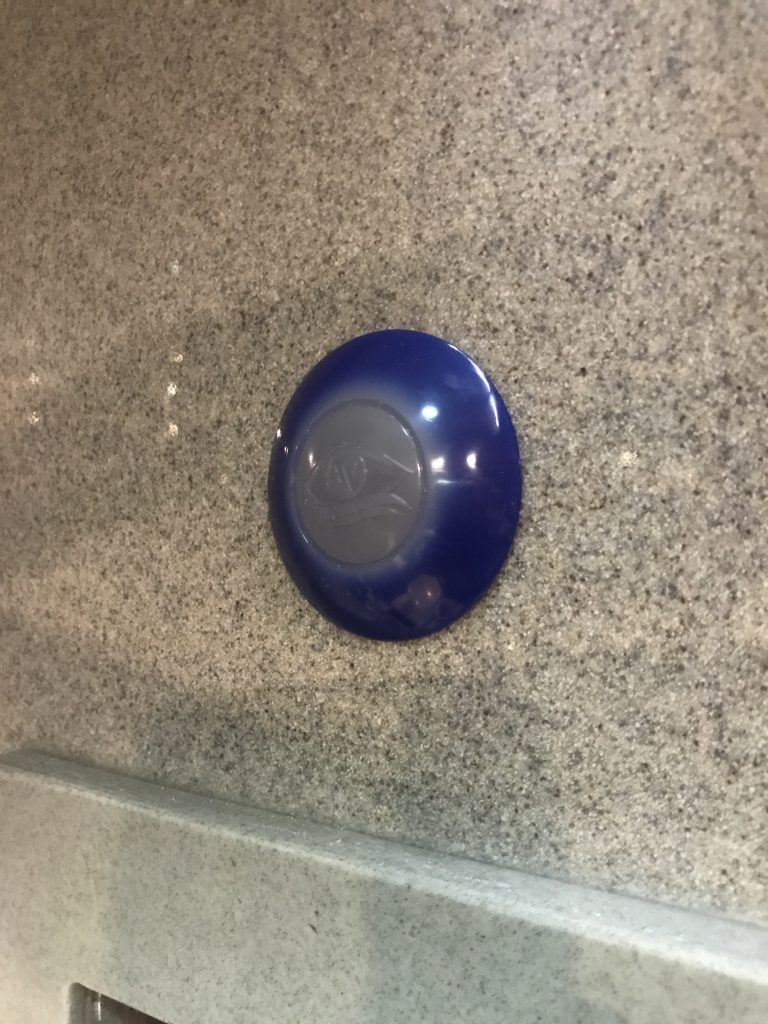
The existing rain head was removed and replaced by the “Magic Mushroom” from Aqua View. The mushroom is mounted on a T connector that flows water in and past the temperature sensitive plastic of the mushroom.
Routing the hose
This is the hardest part. I bought 30 feet of Tech-flex 7/16″ hose from the Tiffin parts store online. You can get this kind of flexible, woven jacket, drinking water safe hose from many sources. On the 40IH, there is a channel that runs under the subfloor from behind the rear toilet, under the shower, under the bed and into the AquaHot compartment.
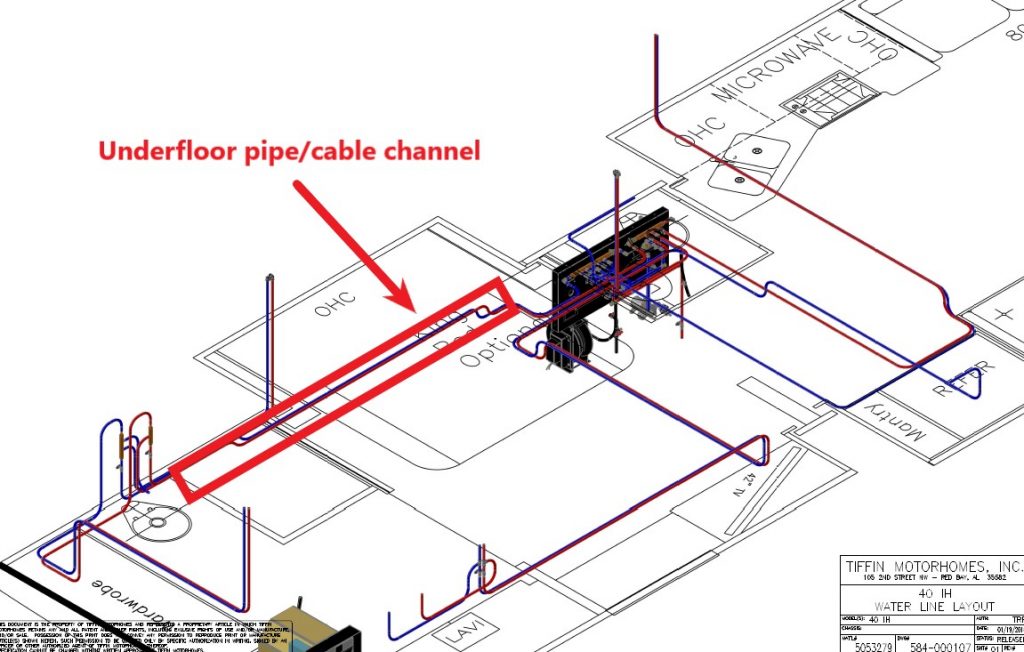
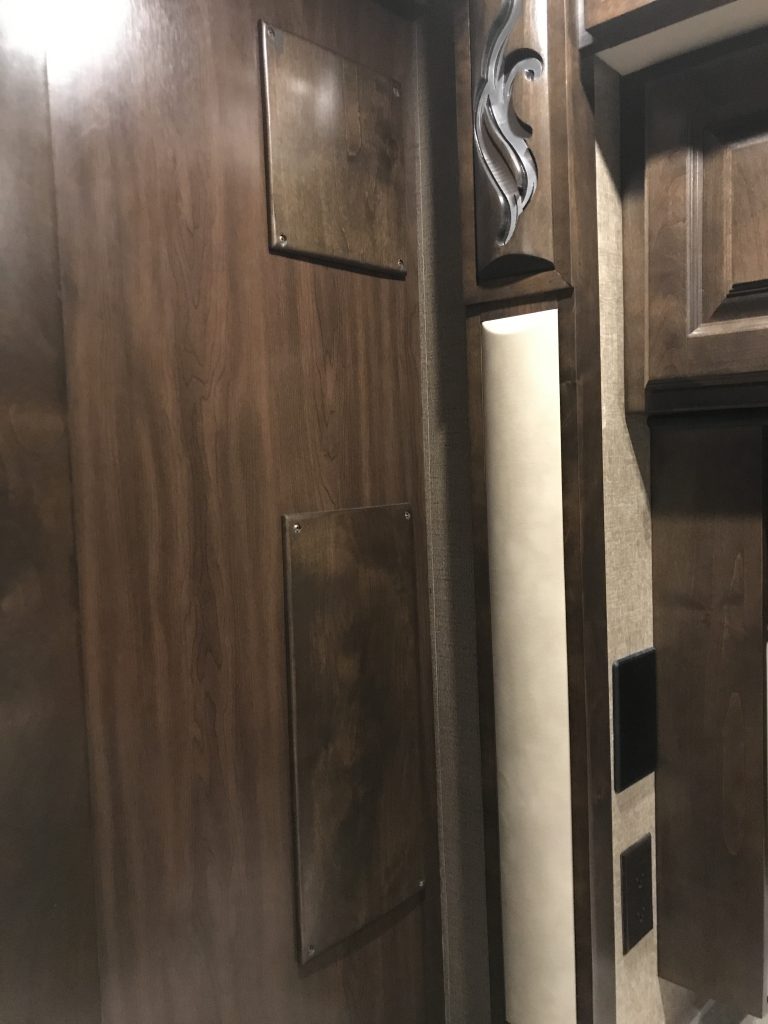
Access can be gained by the removeable panel on the left side of the shower and below the bed by removing the carpeted panel. This is a 40IH, other floor plans may be different.

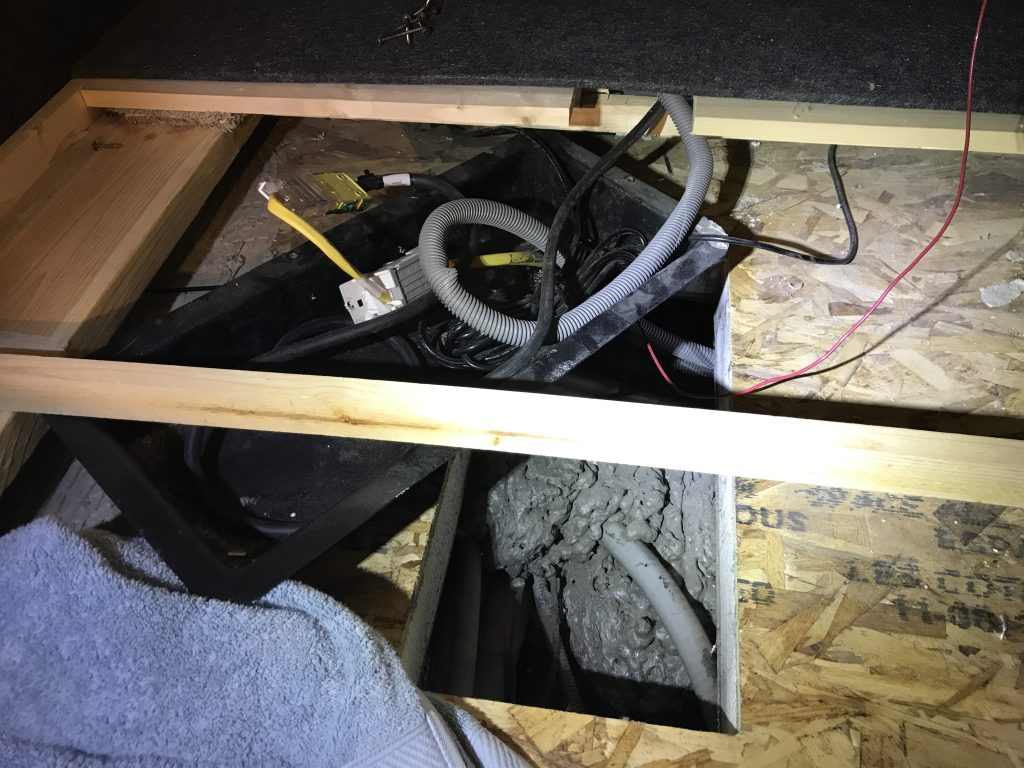
I used a video endoscope with my iPhone to explore the cable/hose channel. I think the easiest method is to go from under the bed to under the shower, grab or attach a string, and pull it back to the under bed. Do the same for going from under the bed to the AquaHot bay. Tie the two strings together and pull the new hose from the shower side to the AquaHot bay. From the AquaHot bay, you just need to poke the hose over the wall between the AquaHot and the wet bay. On our coach, there was 2 large blocks of soft foam stuffed down into the channel under the shower. Pull these out for access and stuff them back in when finished.
Installing the SHOWERMI$ER
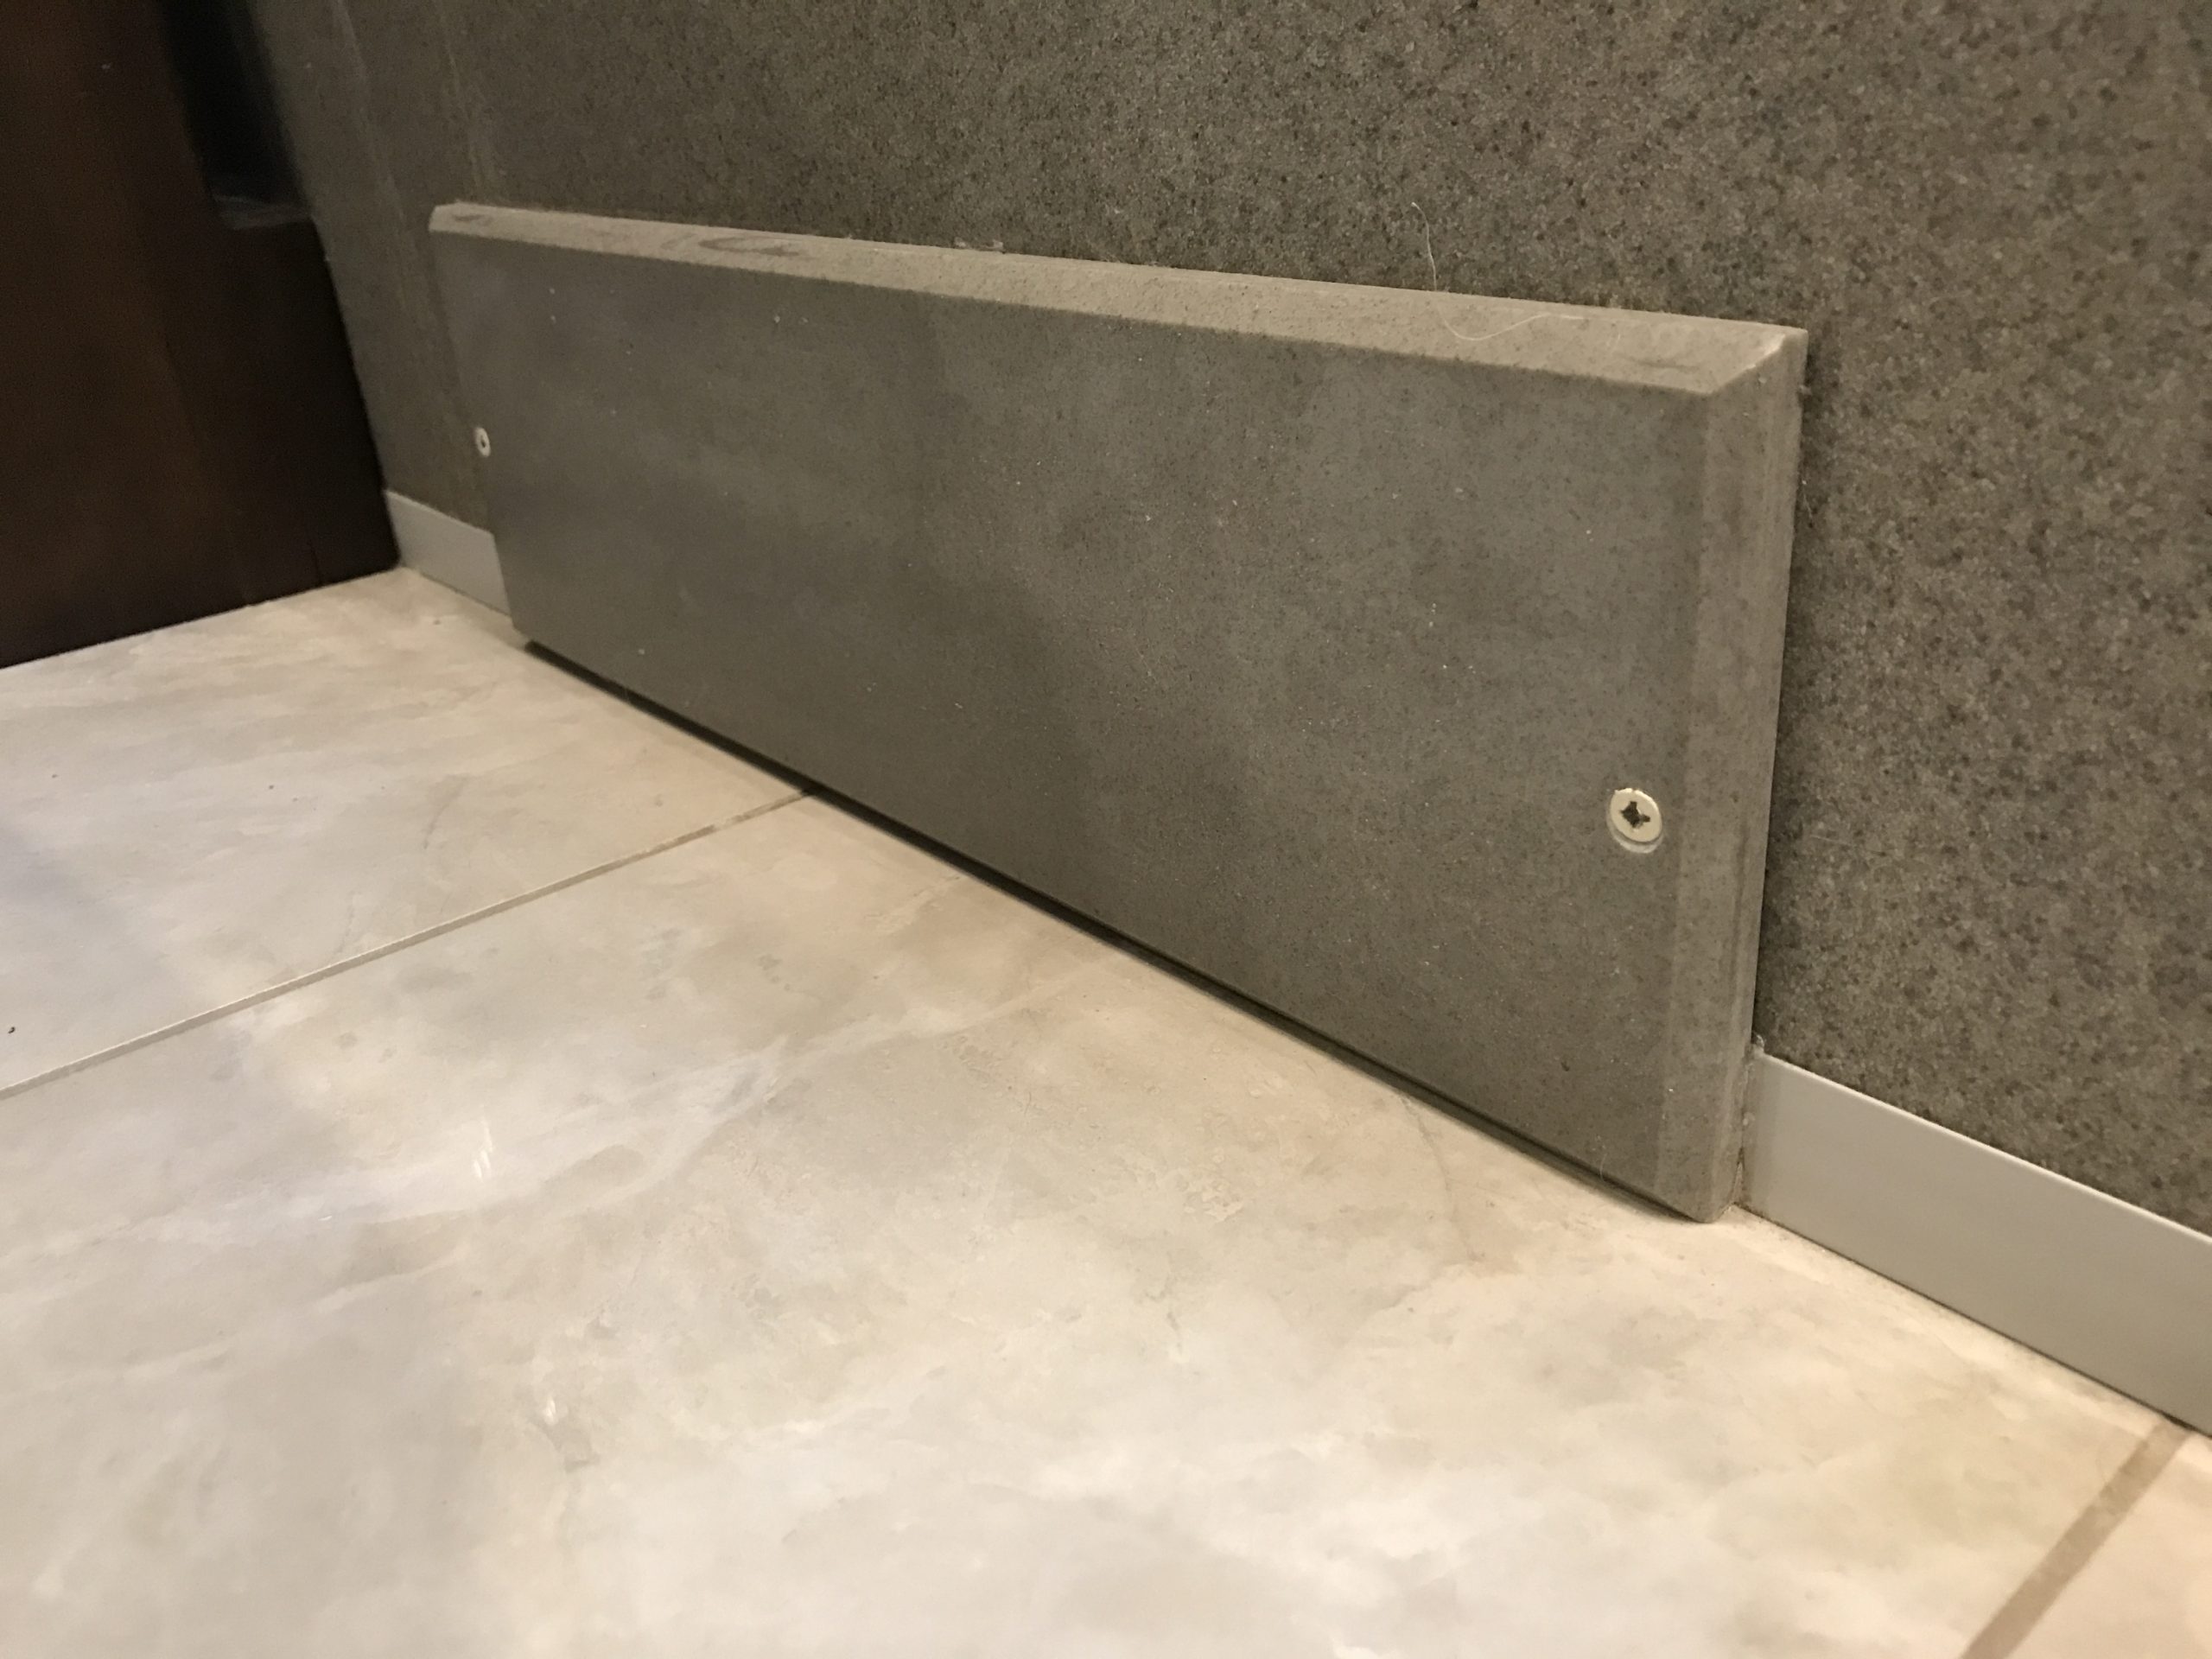
Once the new hose is where you need it, you can work on the shower side. Access to the back of the shower is gained through two panels in the bedroom.
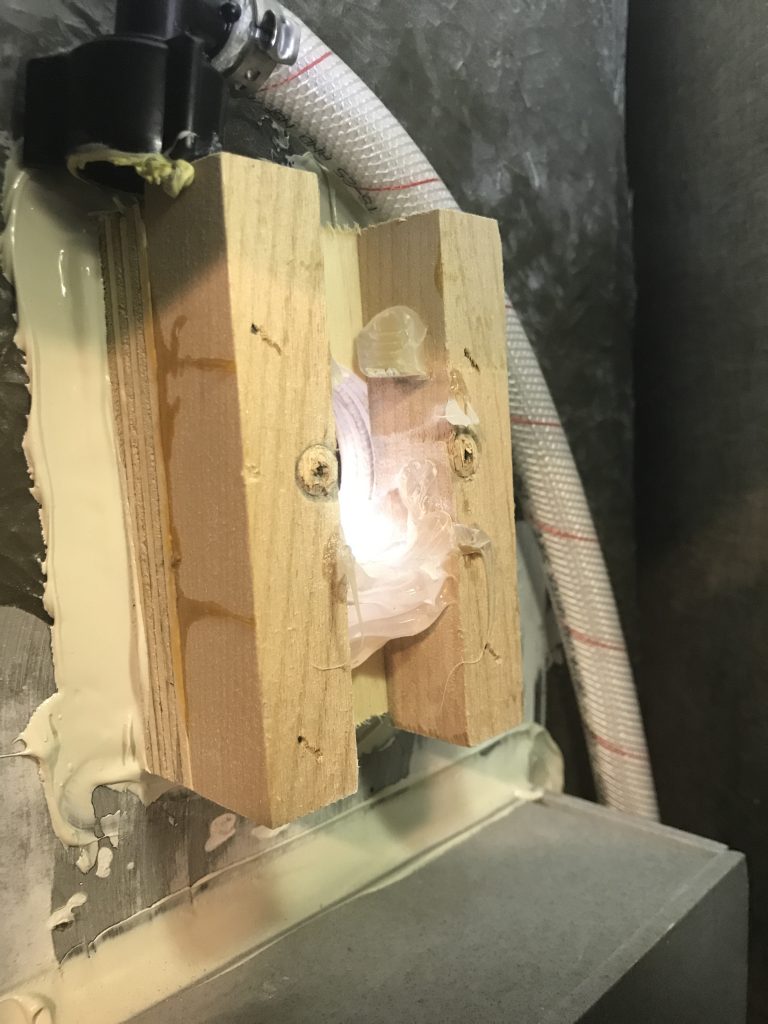
I removed the rain head by unscrewing it (counterclockwise) from inside the shower. This leaves a brass fixture on the other side attached to the hose from the diverter valve. I removed the brass fixture, a large lump of silicone sealant and the two wooden supports (they’re in the way).

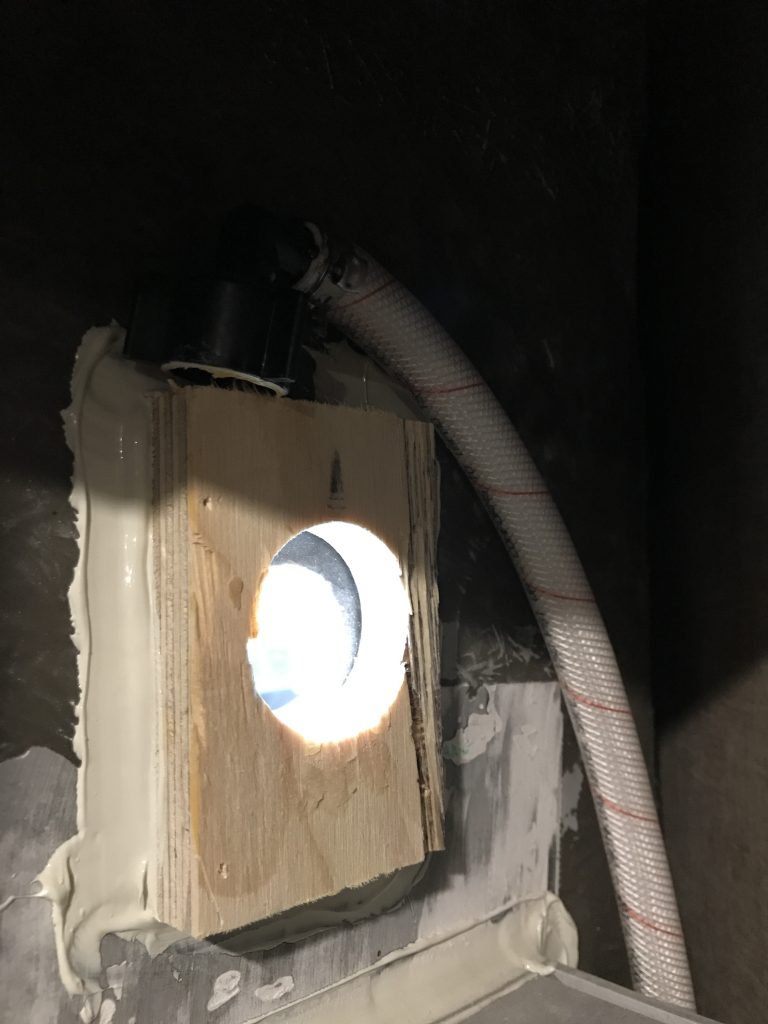
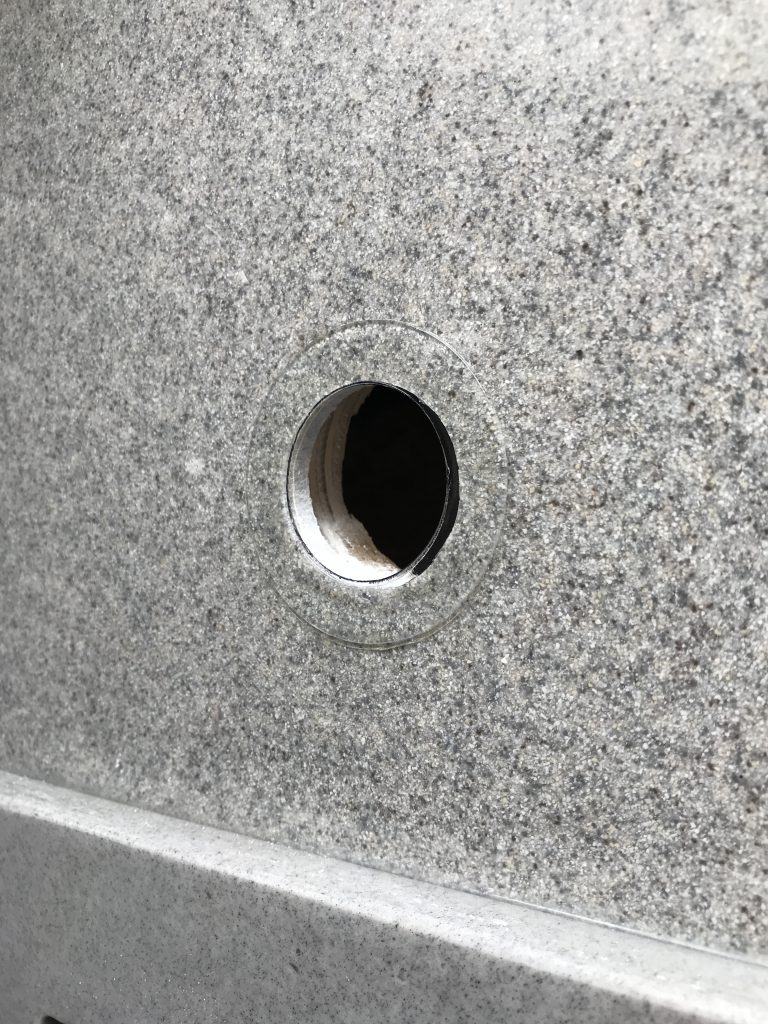
Once the rain head was out of the way, I enlarged the hole on the shower side to about 1-1/4 and applied the clear stick-on gasket.

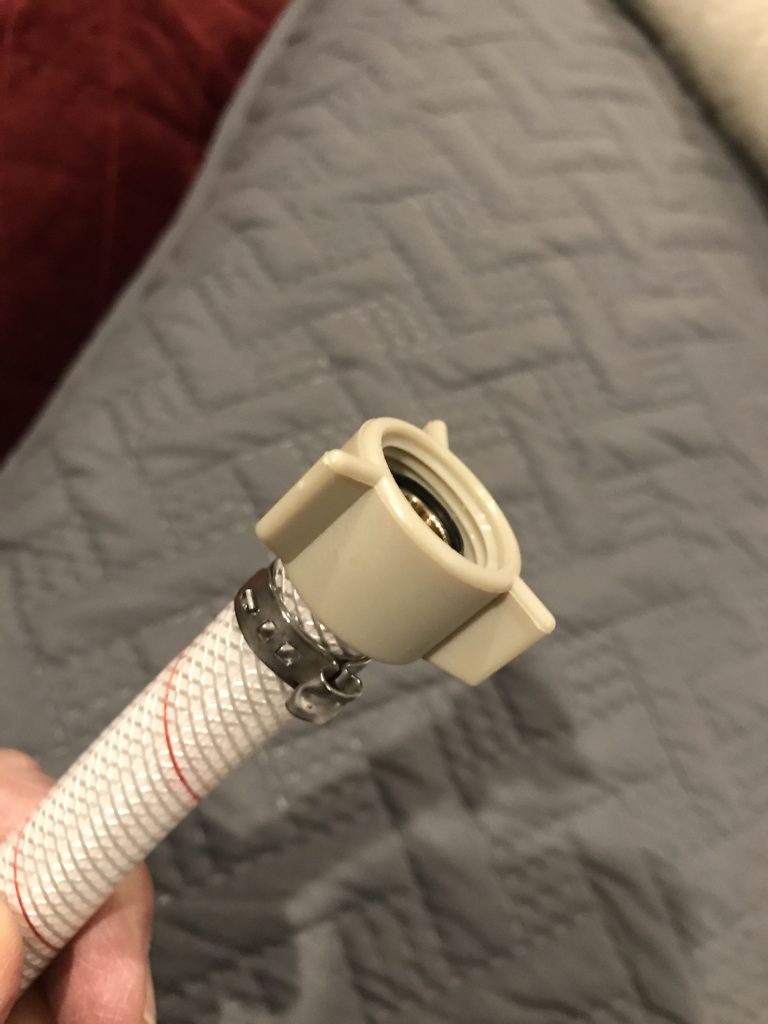
I slipped a new 1/2″ PEX female swivel adapter on the end of the newly pulled hose and crimpled a new band on it. If you don’t want to use bands, regular hose clamps should work.
Place the SHOWERMI$ER T through the hole, screw on the mushroom and then hand tighten the nut on the back. I placed a 1/4″ thick piece of red oak hobby board I had laying around as a backer since the hole in the plywood Tiffin used was a little large. After that, I attached the rain head hose from the diverter to the top of the T and the new hose going back to the tank on the bottom. Be sure to use 3 wraps of Teflon pipe tape to all threads before attaching.
Wet bay connections
Back at the wet bay, there was an existing hose going from the city water / fill tank valve to the water tank. Probably for ease of construction, Tiffin had a straight hose coupler installed here which I just cut out since it was in the perfect place for the Tee.
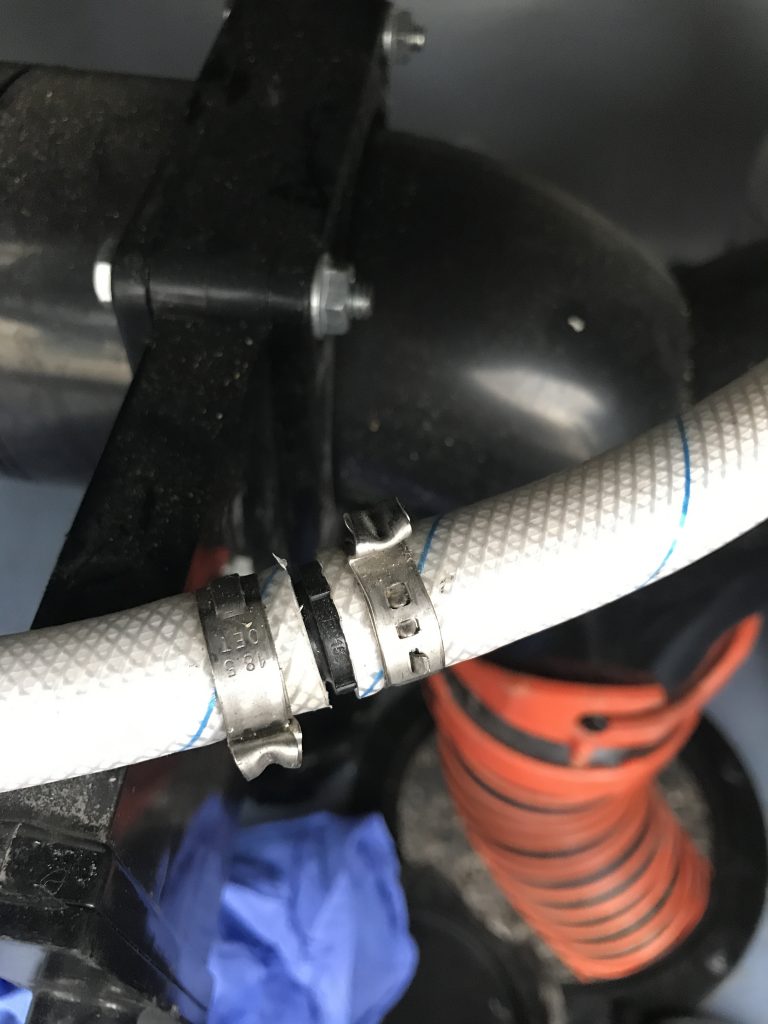
I inserted a new brass T in it’s place, connecting the line together and connecting the hose from the Showermiser as well.

Operation
Operation of the SHOWERMI$ER is simple. We turn the diverter handle to the right, which sends water from the mixer valve to the mushroom and back to the tank. When the mushroom changes from blue to clear, the water is hot and ready! Turn the diverter handle to the left and shower away.

Parts List
- SHOWERMI$ER kit – SAMM01 (about $44)
- Approximately 20 feet of Flex-tech 7/16 water hose (measure for your application)
- 1/2″ PEX Barb x Female Swivel Adapter
- 1/2″ PEX barb tee
- Four PEX bands (18.5mm) or hose clamps
- 4″ x 2.5″ piece of wood, aluminum or plastic to back the shower wall